
Table of Contents
ToggleInstalling a bathroom vanity might seem intimidating if you’ve never done it, but it’s one of the most approachable home improvement projects for beginners and experienced DIYers alike. Whether you’re refreshing a dated fixture or upgrading to a new style, replacing a vanity transforms both the look and function of your bathroom. This guide walks you through each step, from turning off the water to making final connections, with honest talk about what’s simple, what requires care, and when to call a pro. You’ll need basic tools, a few hours, and patience for the plumbing connections, but the payoff is a bathroom that feels brand new.
Key Takeaways
- Installing a bathroom vanity is an achievable DIY project for beginners when you gather essential tools like a basin wrench, level, and caulk gun before starting.
- Turn off the water supply and take photos of existing plumbing connections before disconnecting anything to avoid confusion during reassembly.
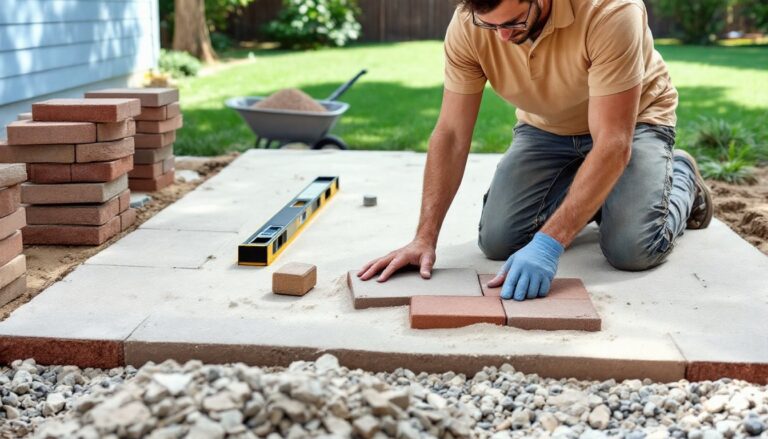
- Use a 24-inch level to ensure your vanity cabinet is perfectly plumb, shimming underneath with wood wedges until both left-to-right and front-to-back angles are correct.
- Apply plumber’s tape and tighten all supply line and drain fittings snugly by hand, then an additional quarter-turn with a wrench—over-tightening causes leaks.
- Caulk all seams where the vanity meets walls and countertop, then perform a 10-15 minute leak check before fully exposing the new installation to water.
Tools And Materials You’ll Need
Before you start, gather everything so you’re not hunting for supplies mid-project. A trip to the hardware store beats stopping work halfway through.
Tools:
- Adjustable wrench or basin wrench (essential for removing and connecting supply lines)
- Screwdrivers (Phillips and flathead)
- Caulk gun and paintable caulk
- Utility knife
- Level (a 24-inch version works well for vanities)
- Measuring tape
- Flashlight or headlamp
- Bucket or wet/dry shop vacuum (water will spill)
- Teflon tape (plumber’s tape)
- Towel or old rags
- Safety glasses and work gloves
Materials:
- New vanity cabinet and countertop (if not pre-assembled)
- Faucet and drain assembly (check compatibility with your countertop)
- Supply lines (flexible stainless steel or braided lines: measure your old ones as reference)
- Plumber’s putty or silicone sealant
- Shims (thin wood wedges to level the cabinet)
Measure your existing space carefully. Note the rough-in dimensions: the distance from the wall to the center of the drain hole and the height of the supply line connections. New vanities vary widely, a standard 30-inch vanity is common, but 24-inch and 36-inch models are also standard. Make sure the cabinet height is correct (typically 32–36 inches to the countertop) and that doors and drawers clear adjacent fixtures.
Before You Begin: Preparation And Safety
The difference between a smooth installation and a soggy bathroom comes down to prep work. Turn off the water supply to the vanity or the entire house, depending on your shut-off valve location. Open the faucet to release trapped pressure and confirm the water is off before you disconnect anything.
Safety First:
- Wear safety glasses to protect your eyes from water and debris.
- Have a bucket or wet/dry shop vacuum ready, old supply lines will drip, and drain water can splash.
- If you’re dealing with older drain traps, check for lead-based paint under the sink before sanding or disturbing them. If unsure, assume they’re present and avoid creating dust.
Clear the area under the vanity completely. Remove the trash can, cleaning supplies, and anything else stored below. Lay down towels or cardboard to catch water and protect your flooring. Take photos of your plumbing connections before you disconnect anything, it sounds obvious, but a quick phone shot saves confusion later. Note which hot and cold supply lines connect where, and observe how the P-trap and drain connections fit together.
Remove Your Old Vanity
Disconnect the supply lines first. Use an adjustable wrench or a specialized basin wrench (which fits into tight spaces under the sink) to loosen the nuts connecting the hot and cold lines. As you unscrew, water will drip, so keep your bucket or towels underneath. A basin wrench is worth the $12–20 investment if you have one: it’s designed for exactly this tight, awkward space.
Next, disconnect the drain. Loosen the slip nuts on the P-trap (the U-shaped pipe under the sink) by hand or with your wrench. Once it’s free, drain any standing water into your bucket, then disconnect the tailpiece from the faucet.
If the vanity is caulked or siliconed to the wall or floor, run a utility knife along the seam to cut the sealant. This prevents the countertop from cracking when you pull the cabinet free. From inside the cabinet (if accessible), look for screws or brackets fastening the vanity to the wall studs. Remove these.
Slide the old vanity away from the wall and out of the bathroom. It’ll be heavy, so get a helper if it’s a large cabinet. Once it’s gone, clean the wall and floor thoroughly. Fill any gaps in the wall with drywall mud or caulk to ensure the new cabinet sits flush and level.
Install The New Vanity Cabinet
Set the new vanity into place without fastening it yet. Check the floor for level using a 24-inch level, place it on the countertop or the top surface of the cabinet. If the cabinet rocks, it’s not level. Shim underneath the low side with thin wood wedges until the level shows the cabinet is plumb in both directions (left-to-right and front-to-back).
Once it’s level, check the alignment of the faucet and drain holes. The drain hole in the countertop must align with the drain opening in the cabinet. Some vanities come with the countertop already mounted: others require you to assemble them. If your countertop is separate, apply a bead of caulk or construction adhesive along the top of the cabinet before placing the countertop. Press it firmly into place and wipe away excess with a damp cloth.
Secure the cabinet to the wall studs using a 2.5-inch wood screw or longer, depending on your cabinet’s thickness. Drill through the mounting rail at the back of the cabinet into the studs behind (typically located 16 inches on center). Use at least two screws, spaced evenly. This prevents the vanity from tipping forward if someone leans on the countertop. If wall studs aren’t accessible at the right height, bathroom vanity installation best practices outline alternative anchoring methods for tile or finished walls.
Connect Plumbing And Utilities
Now comes the moment that intimidates many DIYers, but plumbing connections are straightforward if you go slowly. Install the faucet first, as some vanities come pre-drilled and some don’t. If the countertop has pre-drilled holes, insert the faucet according to the manufacturer’s instructions. Most modern faucets sit on top with a rubber gasket or washer underneath. Secure it with a mounting nut underneath, tightening by hand and then using your wrench if needed.
Attach the supply lines to the faucet inlet ports (hot and cold). These connections use compression fittings or flanged connections. Turn the nut snugly by hand, then tighten with a wrench an additional quarter-turn. Over-tightening causes leaks later, so use restraint.
Install the drain assembly. Apply plumber’s putty around the drain flange, press it into the sink hole, and tighten the mounting nut underneath. Wipe away excess putty.
Connect the P-trap and tailpiece. Align the P-trap with the drain outlet and slip nut it hand-tight, then use your wrench to snug it further. Test connections by turning on the water briefly. Watch for drips. Tighten slightly if needed, but check plumbing fixture connection guides for torque specs, over-tightened fittings often crack. Route the supply lines and place the shutoff valves (if you removed them) back in the same position. These angle stops give you a dedicated shut-off for future service.
Seal And Finish Your Installation
Caulk all exposed seams where the vanity meets the wall and countertop. Use paintable caulk (silicone or acrylic) and apply a smooth, even bead. Wet your caulk tool (a caulk gun’s smoothing tool, or a wet finger) as you work to create a professional appearance. Caulk prevents water from seeping behind the vanity and damaging walls. Let caulk cure per the manufacturer’s instructions, typically 24 to 48 hours, before exposing it to water.
Clean the countertop and chrome fittings with appropriate cleaners. Polish faucet handles and supply line nuts so the installation looks finished. Run a slow leak check: turn on the water at the shut-off and observe all connections for 10–15 minutes. A slow drip might indicate a connection that needs one more quarter-turn with your wrench, or it could signal a faulty washer that needs replacement. Better to catch this now than discover water damage under the sink weeks later.
For vanities installed over existing flooring, bathroom remodeling guides recommend checking for gaps and sealing the base with caulk if needed. This prevents debris and pests from entering underneath. Test the sink’s stopper and overflow drain to ensure they function smoothly. If the vanity has drawers or cabinet doors, close them gently to confirm they don’t bind after installation.
Conclusion
Installing a bathroom vanity is an achievable project for most homeowners with basic tool skills and patience. The hardest part is usually the first plumbing connection, once you’ve tightened one nut, the rest feel easier. Take your time, avoid over-tightening, and don’t skip the leak check. If at any point you’re unsure about structural changes, wall anchoring, or gas/electrical connections near your vanity, calling a licensed plumber or contractor is the smart move. A small professional consultation beats expensive water damage. Your new vanity will refresh your bathroom’s look and function for years to come.