
Table of Contents
ToggleInstalling a range hood isn’t as intimidating as it sounds, even if you’ve never tackled kitchen ventilation before. A properly installed range hood removes cooking odors, steam, and airborne grease before they settle on your cabinets and walls, which means less cleaning and a healthier kitchen environment. This guide walks you through the entire process, from planning and prep to testing your finished installation. Whether you’re upgrading an existing hood or installing one from scratch, you’ll find practical steps to get the job done safely and right the first time.
Key Takeaways
- How to install a range hood starts with understanding your hood type (under-cabinet, island, downdraft) and whether you need ducted venting to the exterior or a ductless recirculating system.
- Proper CFM sizing is critical: aim for 100 CFM per linear foot of gas cooktop or 50 CFM per linear foot for electric cooktops to ensure effective ventilation.
- Mount the range hood 15–18 inches above your cooktop using a level, secure fasteners into studs or use heavy-duty anchors, and recruit help if the unit weighs over 40 pounds.
- Connect ductwork using aluminum foil tape rather than standard duct tape, maintain straight paths with minimal bends, and slope horizontal runs ¼-inch per foot upward to prevent grease and moisture buildup.
- Test your installation by running the hood and confirming airflow with a tissue test, checking for noise or vibration, and inspecting the exterior damper to ensure it opens and closes freely.
- Hire a licensed electrician for new circuit wiring rather than using extension cords, which violate code and pose a fire hazard.
Understanding Your Range Hood And Kitchen Setup
Before you buy a range hood or start any work, understand what type you need. Under-cabinet hoods mount directly beneath a cabinet and are the most common choice for existing kitchens. Island hoods hang from the ceiling and work for cooktops in the middle of the room. Downdraft and pop-up hoods integrate into the cooktop itself and are less common in standard renovations.
Range hoods come in two flavors: ducted (vented to the outside) and ductless (recirculating air through filters). Ducted hoods are more effective because they exhaust moisture and odors outside rather than filtering and returning air to your kitchen. If your kitchen doesn’t have exterior ductwork already, ducted installation is more involved but worth the effort.
Check your cooktop’s location relative to exterior walls and attic access. Vertical runs are easiest: horizontal runs require careful slope to prevent condensation backup. Measure the horizontal and vertical distances you’ll need to duct, and confirm your hood’s CFM (cubic feet per minute) rating matches your cooktop size. A general rule: 100 CFM per linear foot of cooktop for gas, 50 CFM per linear foot for electric.
Gather Tools And Materials Before You Start
A smooth installation starts with having the right tools on hand. You’ll need a drill-driver, a stud finder, a level, a tape measure, and a drywall saw or hole saw (for ductwork penetrations). If cutting metal ductwork, grab tin snips or a rotary tool with a metal-cutting disc. You may also need a screwdriver set, adjustable wrench, and a caulking gun if sealing gaps.
Materials depend on your setup but typically include the range hood unit itself, ductwork (6-inch or 8-inch metal ducts are standard), mounting brackets, hardware (screws, bolts, and anchors), flexible duct connector, duct tape or preferably aluminum foil tape (more durable), and exterior damper or flapper to prevent backflow. If your kitchen has drywall around the hood opening, you may need drywall, drywall tape, and joint compound for finishing. Have safety glasses, work gloves, and a dust mask ready, metal ductwork has sharp edges, and ceiling work means dust falling.
If electrical work is required, confirm whether you need to run a new circuit or tap an existing outlet. This often requires a licensed electrician depending on local code.
Prepare Your Kitchen And Mark The Installation Area
Clear the cooktop and surrounding workspace. Turn off power to any existing hood or nearby circuits, and cover appliances and countertops with plastic sheeting to protect from dust.
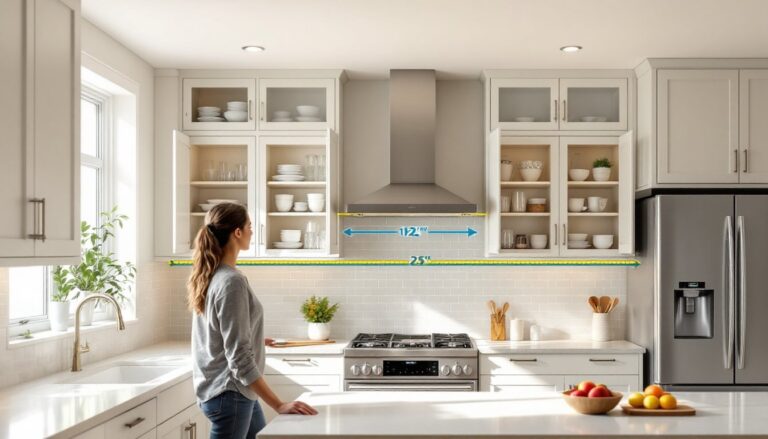
Use your range hood’s template (included in most kits) to mark mounting holes on the cabinet or wall. If no template exists, measure the hood’s width and height, center it above your cooktop, and mark pilot holes. Check that the hood sits 15 to 18 inches above the cooktop surface for under-cabinet models: follow manufacturer specs if different. Use a level to ensure the hood will hang straight, a tilted hood looks sloppy and vents poorly.
Mark the location for your ductwork penetration. If venting through an exterior wall, drill a pilot hole from inside, go outside to confirm the exit point is clear (no plumbing, utilities, or trim interfering), then enlarge it to match your duct size. For attic venting, mark the ceiling penetration and confirm it clears joists, electrical wiring, and HVAC ducts.
Safety And Electrical Considerations
Range hoods require a dedicated 240V or 120V circuit depending on the model, check your unit’s electrical specifications. If an outlet doesn’t exist near the hood, running new wiring requires turning off the main breaker and is best left to a licensed electrician. Using an extension cord is a code violation and a fire hazard.
Always confirm power is off before any work using a non-contact voltage tester. Wear safety glasses when working overhead or with sheet metal. If insulation or debris falls from above, a dust mask prevents inhalation.
Install The Mounting Bracket And Secure The Hood
Drill pilot holes into the studs or cabinet where you marked. For cabinet mounting, use 3-inch wood screws that bite deep into the solid framing. For wall mounting into drywall alone, use heavy-duty toggle bolts or expansion anchors, drywall alone won’t support a hood’s weight.
Attach the mounting bracket to these holes, tightening each fastener evenly. Double-check the bracket is level before final tightening. If the bracket shifts, loosen one side slightly, slide the bracket into position, and re-tighten.
Carefully lift the range hood (recruit a helper if it’s over 40 pounds) and hang it on the bracket. Some hoods slide or bolt to the bracket, follow your manual. Once seated, secure any additional fasteners per the instructions. Don’t skip this step: the hood must be rock-solid before you connect electrical and ductwork.
If you’re installing a new cabinet above the hood (soffit boxing), frame it now before connecting ducts. Reference installation guidance from experienced DIY resources for cabinet-framing techniques if needed.
Connect Ductwork And Ventilation
This is where ventilation performance is made or broken. Attach the flexible duct connector (a transition collar) to the hood’s outlet using aluminum foil tape or a hose clamp. Foil tape is superior because it withstands temperature and humidity better than standard duct tape.
Run your metal ductwork toward the exterior wall or attic penetration. Maintain as straight a path as possible, every bend and horizontal run reduces airflow. If you must make turns, use 90-degree elbows and keep them angled upward slightly (¼-inch per foot slope) if they’re horizontal. Sagging ducts trap grease and moisture, breeding mold and reducing flow.
Seal all duct joints with foil tape, wrapping it clockwise around the seam for a tight seal. Flex duct is tempting because it’s easy to bend, but avoid it for long runs, it traps grease in its ridges and kinkers easily. Metal is the standard choice and lasts decades.
Instal an exterior damper or hood flapper at the duct exit to prevent outside air (and pests) from backflowing into your kitchen when the hood isn’t running. Caulk around the exterior penetration with silicone caulk to seal gaps and prevent weather intrusion.
For a reference on ducting best practices, consult detailed range hood installation guidance, which outlines proper duct sizing and routing.
Test And Troubleshoot Your New Range Hood
Before calling the job done, test everything. Switch the power back on, turn on the hood fan, and listen for unusual noise. A quiet hum is normal: loud rattling means the hood isn’t secured properly or internal parts are loose.
Hold a piece of tissue near the hood’s intake grille while it runs. The tissue should pull toward the grille. If it doesn’t, check for blockages in the hood filter or ductwork. A damper stuck in the closed position is another culprit, confirm it opens freely.
If you installed a new duct run, you might experience a small amount of dust during the first run. This settles after a few minutes. Run the hood for 5–10 minutes with a door or window open slightly to establish airflow.
Check for vibration by running the hood on low and high speeds. If it vibrates excessively, tighten all fasteners and confirm the hood is level. Vibration often signals a loose mounting bolt or an imbalanced fan wheel, both of which need attention.
Inspect your exterior damper from outside to ensure it’s opening freely and sealing when the hood is off. If it sticks, a little silicone lubricant on the hinge (not duct-blocking grease) helps. Finally, run the hood while cooking to confirm it’s capturing steam and odors effectively. If moisture is still settling on cabinets, you may need a higher-CFM hood or better ductwork routing. Consult trusted resources for more troubleshooting tips if problems persist.